I first saw photos of frozen bubbles last year – too late in the season for me to try them. I completely forgot about them until they started appearing in my Facebook feed this year. I had just one day left of a frigid cold front in our area, so I did some quick research online, gathered supplies and spent three glorious hours watching bubbles freeze on my back deck the next morning. Weather-wise it was 12° F / -11° C when I started and warmed up to 20° F / -7° C by the end. Also I felt no discernible wind and none was detected by my weather station.

"Crystal Moon"
My Bubble Solution
There are many different recipes for homemade bubble solution to be found online! After watching a kid’s science video that explained why bubbles pop (they evaporate), I decided to use a recipe with glycerin because that significantly slows the evaporation process allowing the bubbles time to freeze. I used the recipe found in this article, but added some sugar because yet another article mentioned that it helps enhance the crystals as the bubble freezes.
My bubble solution recipe:
1 cup water
2 Tbsp liquid dishwashing soap (I used Dawn)
1 Tbsp glycerin
1 Tbsp sugar
2 Tbsp liquid dishwashing soap (I used Dawn)
1 Tbsp glycerin
1 Tbsp sugar
Blowing the Bubbles
A straw is the easiest way to control both the size and placement of the bubbles. (I also used a piece of clear vinyl tubing which worked the same as a straw and is ultimately more durable for long-term use.) Keep the size of your bubbles between 1 – 1.5 inches. I didn’t have much luck with bubbles larger than 1.5 inches – they popped well before they finished freezing. Smaller bubbles don’t seem to evaporate as quickly and they are not as fragile in a slight breeze. Just move in close with your camera to fill the frame with the bubble and no one will know they aren’t very big.
Photographing the Bubbles
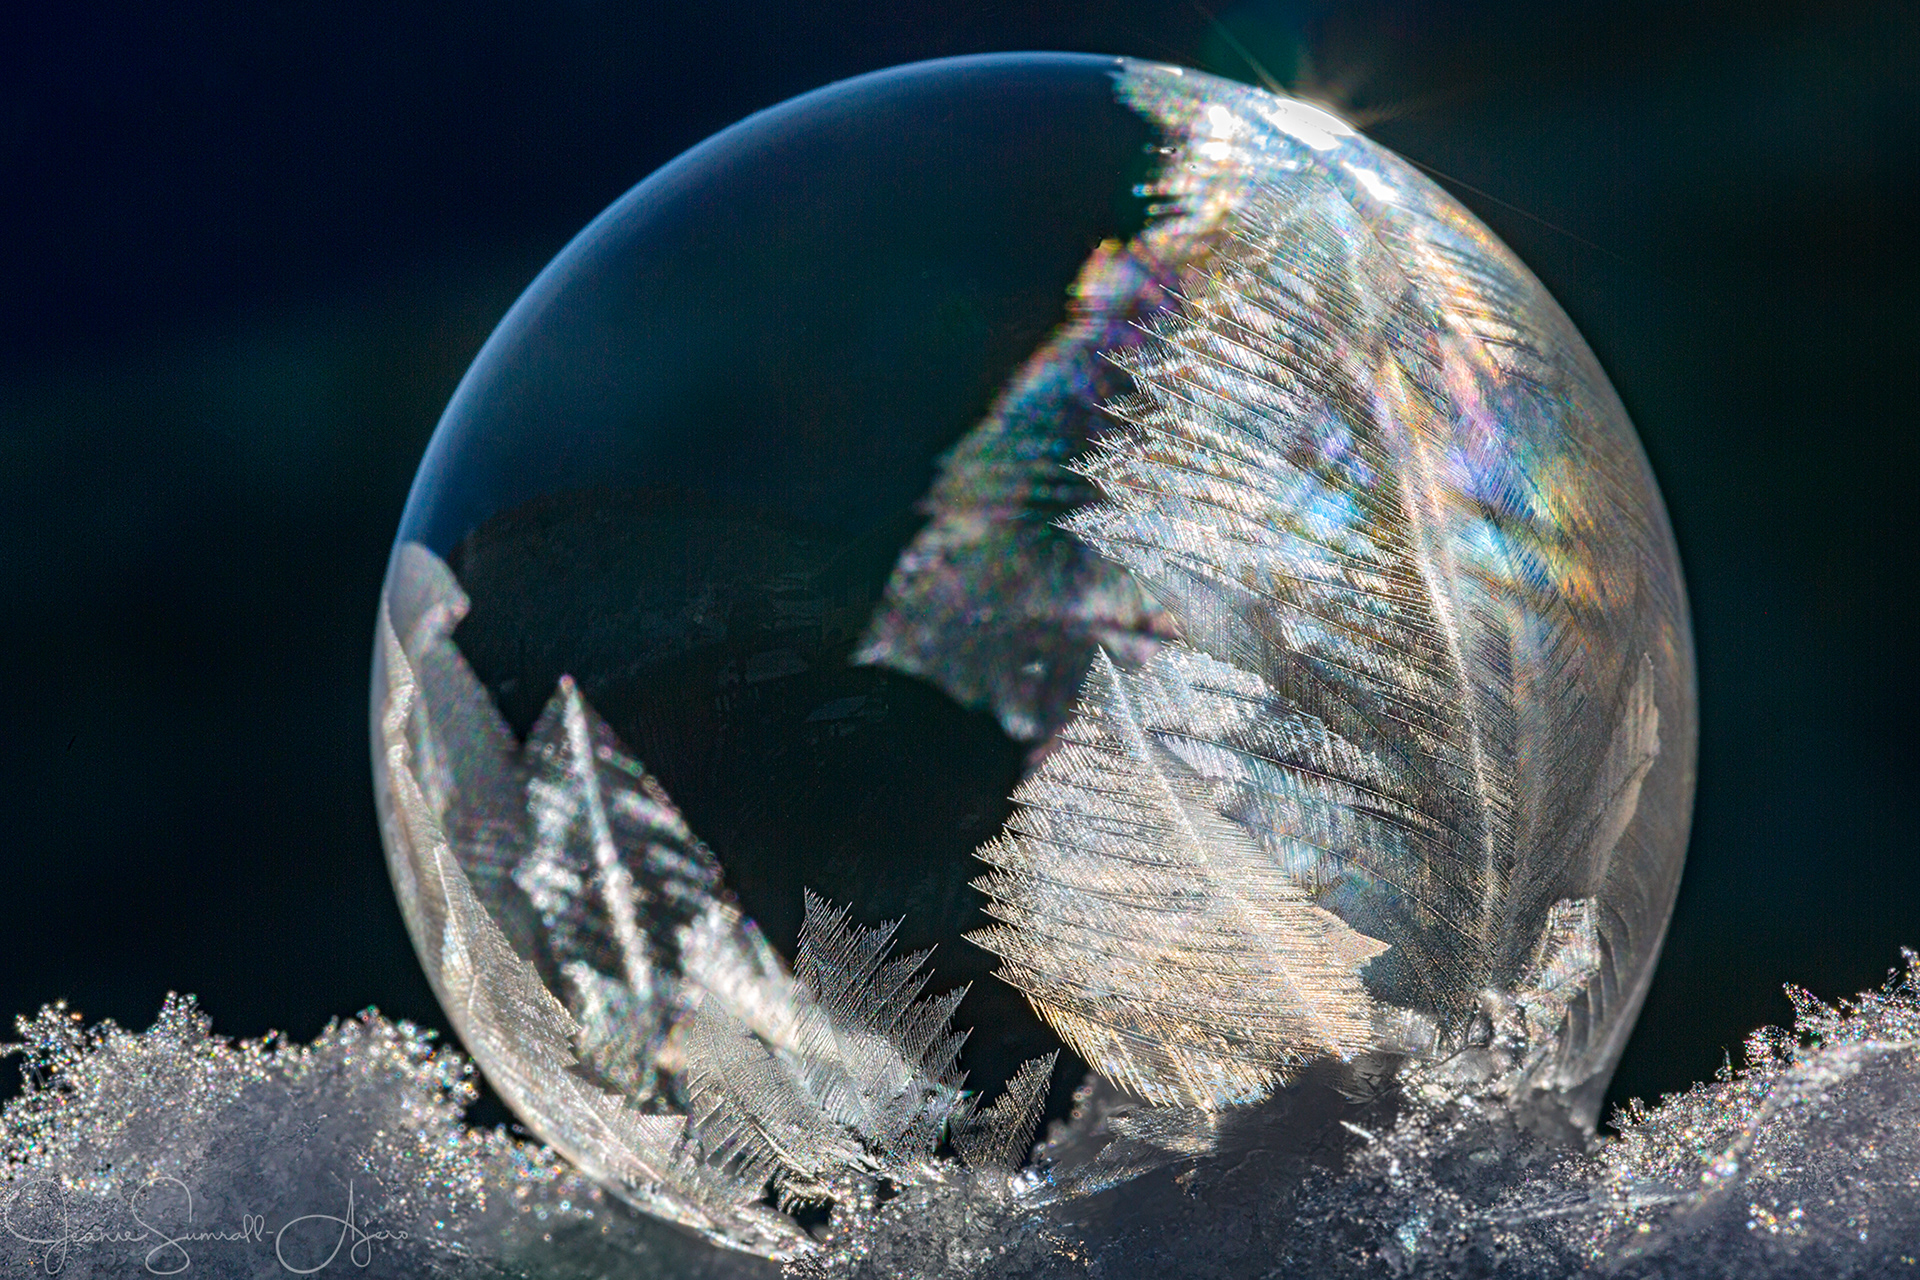
The direction of the light makes a huge difference in the way your camera captures the frozen bubble. If you want your bubble to look like clear crystalline, position your camera so that the bubble is backlit as much as possible. You don’t want your camera pointing into the sun, but just outside of the frame of your shot for greatest impact.
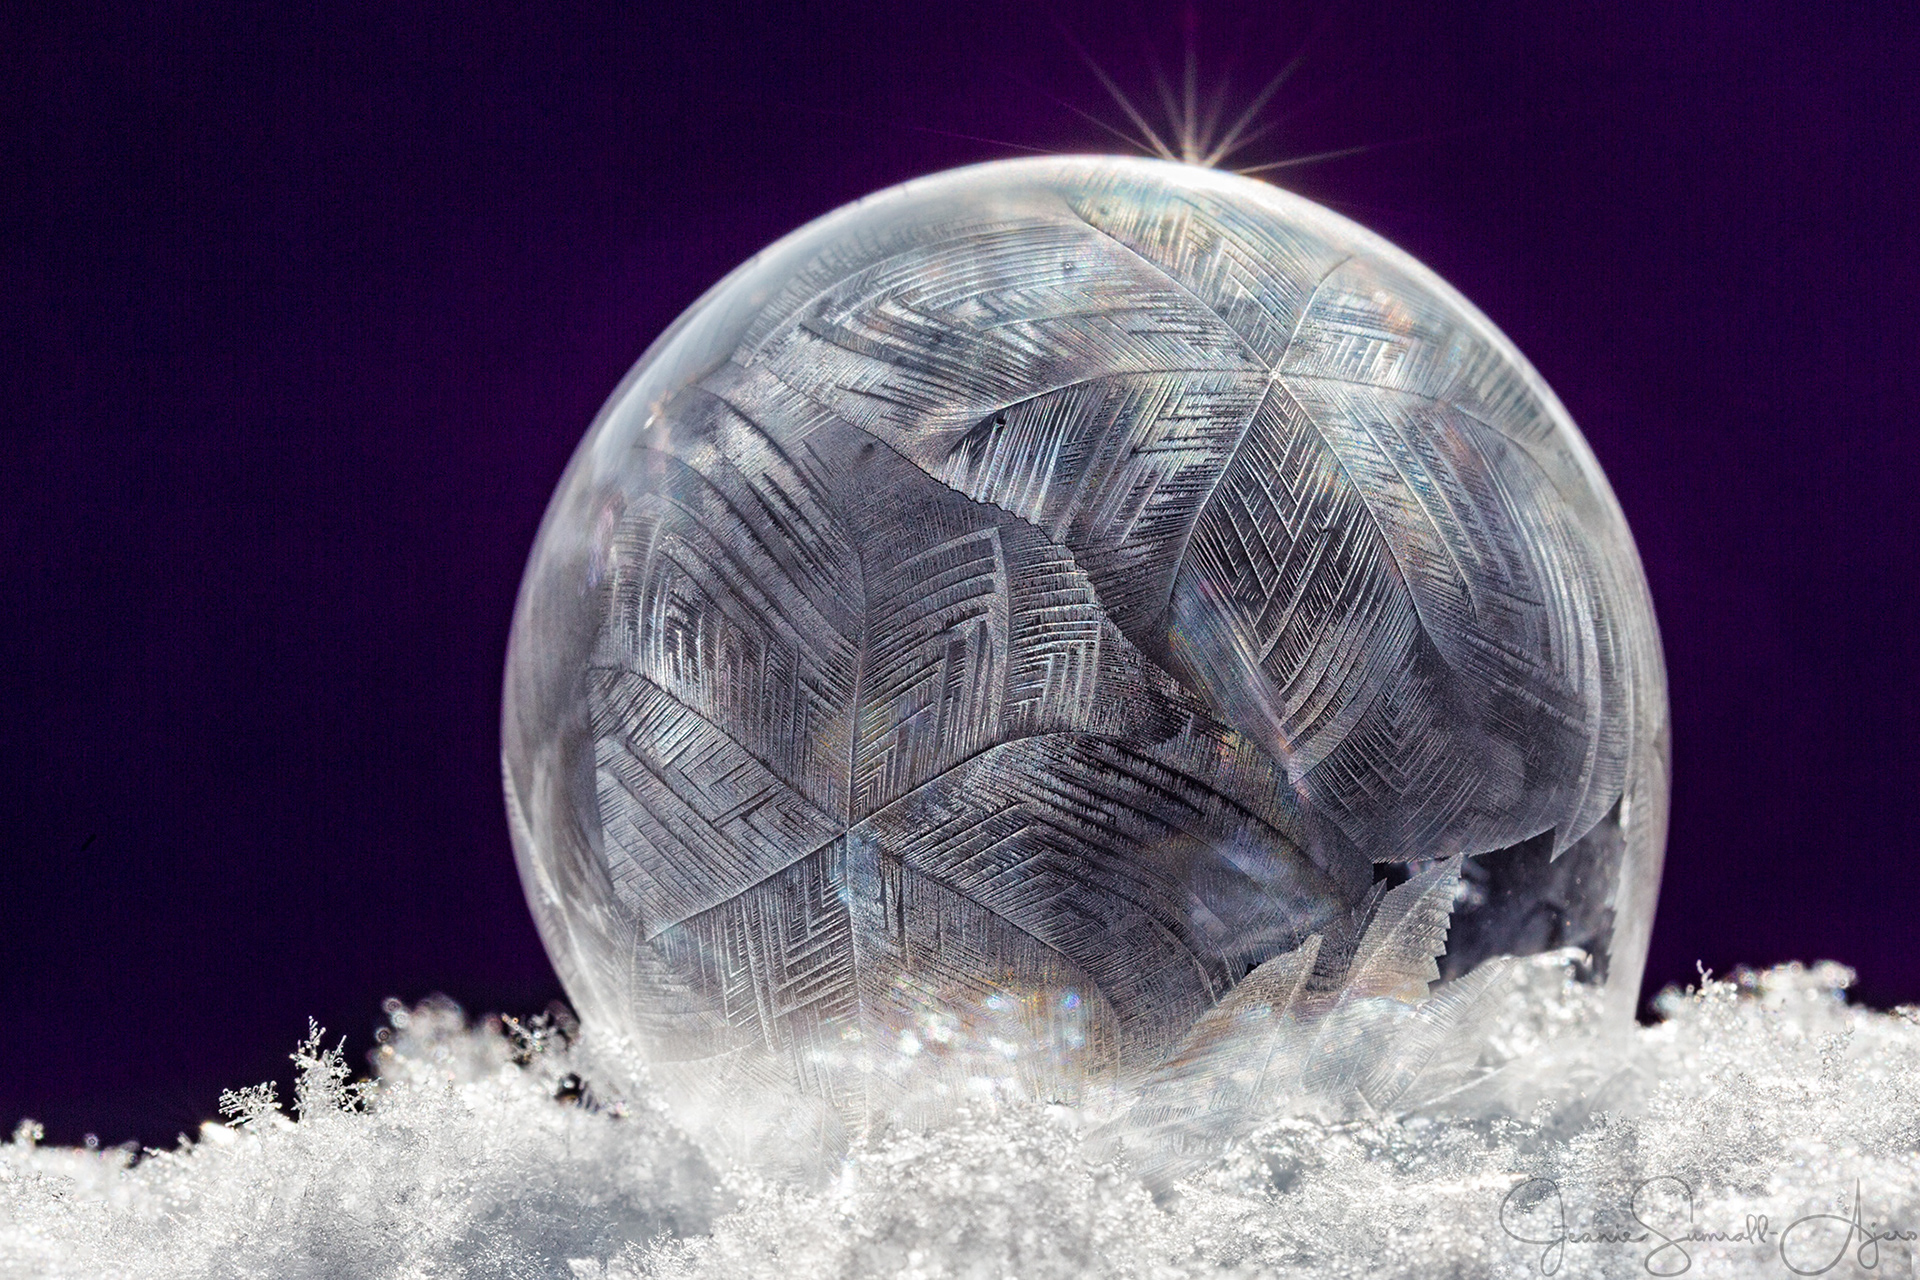
Backlit frozen bubble with dark background.
Alternatively, if the light is off to the side, the frozen bubble will look more milky/pearly. The following two photos are of the same bubble, but taken (with my cell phone) at different angles to the light.

Another important factor in photographing frozen bubbles is having a dark background behind the bubble. This could be a shaded area (with the bubble in sun) or you can hold a dark backdrop behind it. The beautiful crystal patterns in your bubble won't show up as well against a light background.
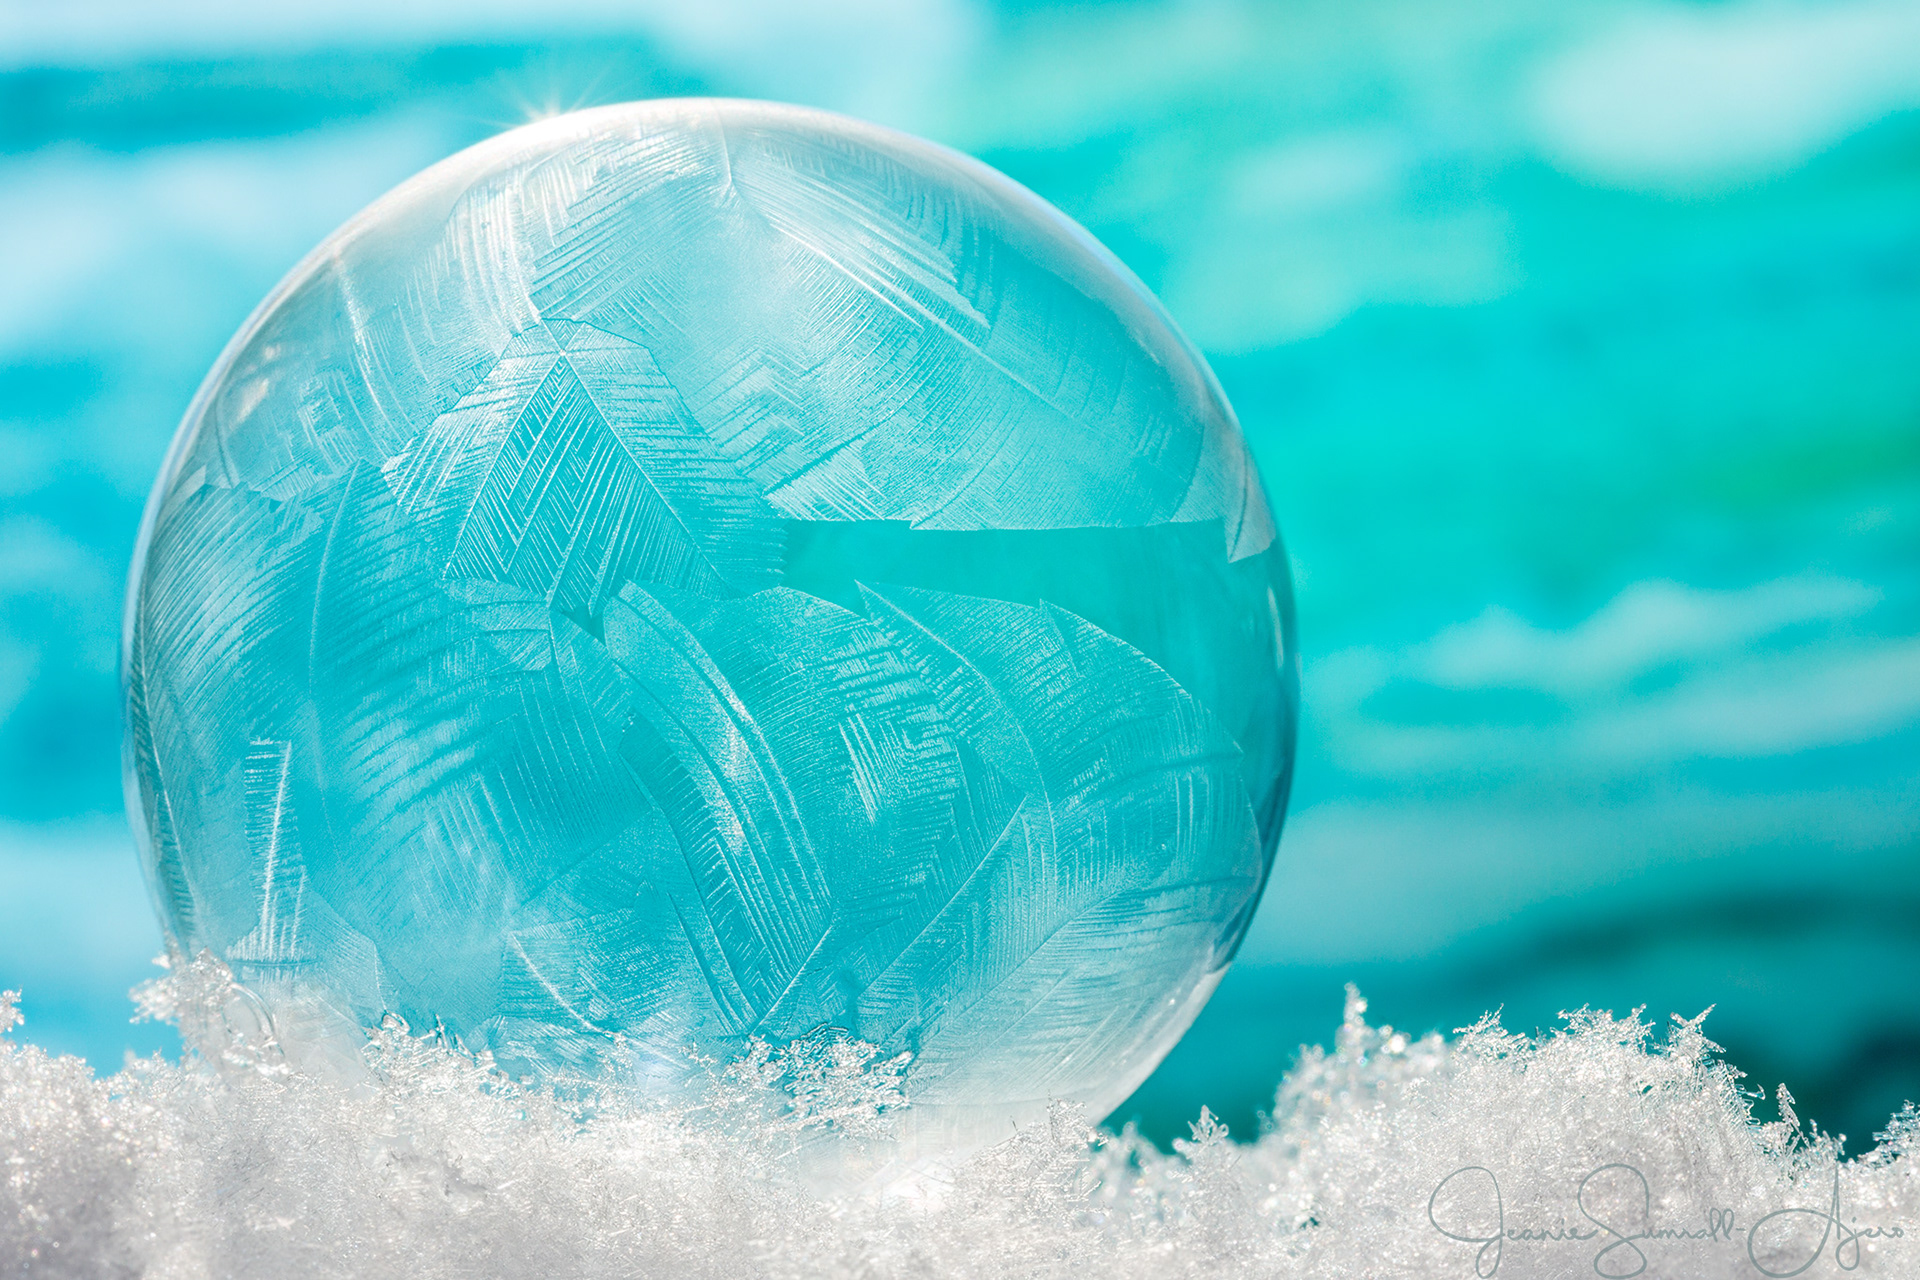
Backlit frozen bubble with light background.
The colder it is, the faster the bubble will freeze. At the coldest temperatures, my bubbles froze within 30 seconds. It was difficult to blow the bubble, return to my camera and nail the focus before the bubble finished freezing, so all of my best shots were of a fully-frozen bubble. However, once the temperature warmed up a bit (above 15° F / -9° C) it took a minute or longer to freeze, which gave me time to compose, focus and capture partially frozen bubbles in addition to the fully frozen ones.
"Icy Bloom"
The Effect of Temperature on Crystal Formation
In most of the photos I’ve seen of frozen bubbles, the crystal patterns have what looks like a leafy or feathery structure. But the pattern I got at first looked like a bunch of little hexagons that grew together over the surface of the bubble. In fact, the bubble started freezing before I had even finished blowing it! I wondered if it might have to do with the temperature of the bubble solution. I had left mine in an unheated garage overnight and as soon as I brought it out into the 12 degree temps, it started getting slushy. I.e., it was very cold!
I decided to mix up a new bubble solution so that it would be at room temperature. When I tried that solution 20 minutes later, it was about the same temperature outside (just 2° F warmer). Lo and behold, the crystals formed much slower (50 seconds to freeze the entire bubble) with the warmer bubble solution and the crystals looked much more feathery. (Note that this is just one data point and there may be other factors that affect the shape of the ice crystals such as minerals in the water, exact temperature of the bubble solution, etc.)
Obviously the air temperature made a difference in how long it took for the bubbles to fully freeze, but I was surprised at how big of a difference:
12° F / -11° C with very cold bubble solution: 33 seconds
14° F / -10° C with room temperature bubble solution: 51 seconds
20° F / -7° C with room temperature bubble solution: 4 minutes!
14° F / -10° C with room temperature bubble solution: 51 seconds
20° F / -7° C with room temperature bubble solution: 4 minutes!
As I mentioned in the Photographing the Bubbles section, the longer it takes to freeze, the more chance you have to compose, focus and take a series of photos. The downside is that the bubble is much more apt to burst before fully freezing – especially if there is a breeze. Your best bet is to keep your bubbles small and sheltered.
Unfortunately, our frigid temps have lifted for the foreseeable future, but I plan to run some more experiments once they return. Stay tuned for Part 2 of my Frozen Bubble Escapades!