I’ve always had a fascination with the concept of time. As a child, I loved reading books about time travel. As an adult, I find it curious how time seems to slow down when I’m “in the zone”. As a photographer, I love playing with different ways of exploring the visual representation of the passage of time. The most common way of doing this is with a long exposure, but long exposures usually span a few seconds to a few minutes at most.
For longer timespans, it’s necessary to take multiple photos over time and combine them in some way. This is typically how star trail images are created, but there are other creative options too such as time stacks and time slices. These are essentially a single image representation of a timelapse video. (And yes, I’m fascinated by timelapse videos as well because they allow us to view time faster than we experience it.)
Recently I was asked to give a presentation on Time Slice Photography to my local camera club. I’ve made a couple such images in the past, but decided to take a new series of images for a timelapse from which I could create examples for my presentation.
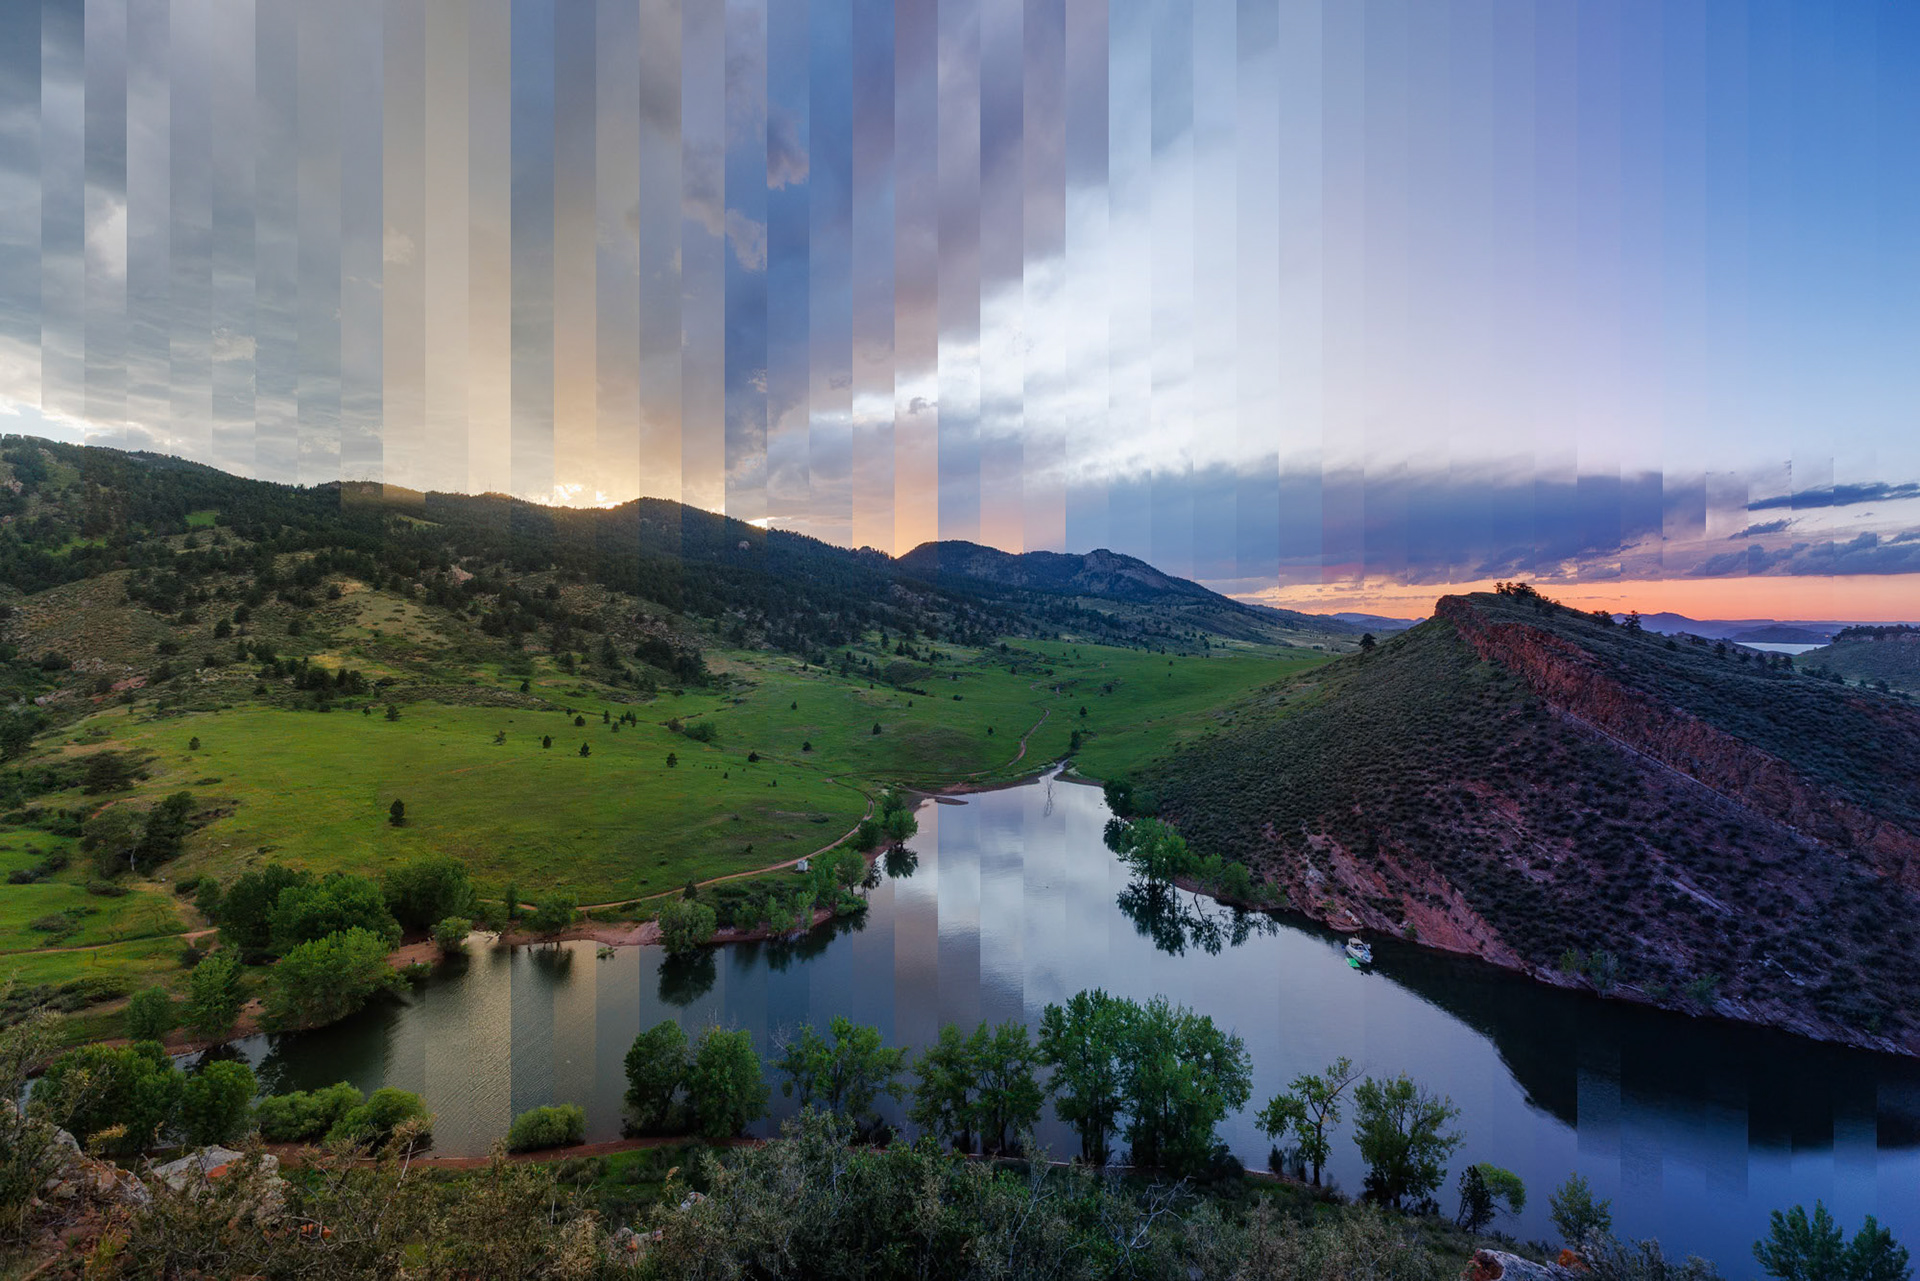
A timelapse video is typically comprised of 30 images per second – the video above was created from 440 photos. That's way too many photos to work with for a time slice photo, so I decided to try using just 10% of them, i.e. every 10 photos. The most basic configuration for a time slice is vertical slices with each slice representing one of the photos – the first photo slice is typically positioned on the left and the last photo slice on the right:
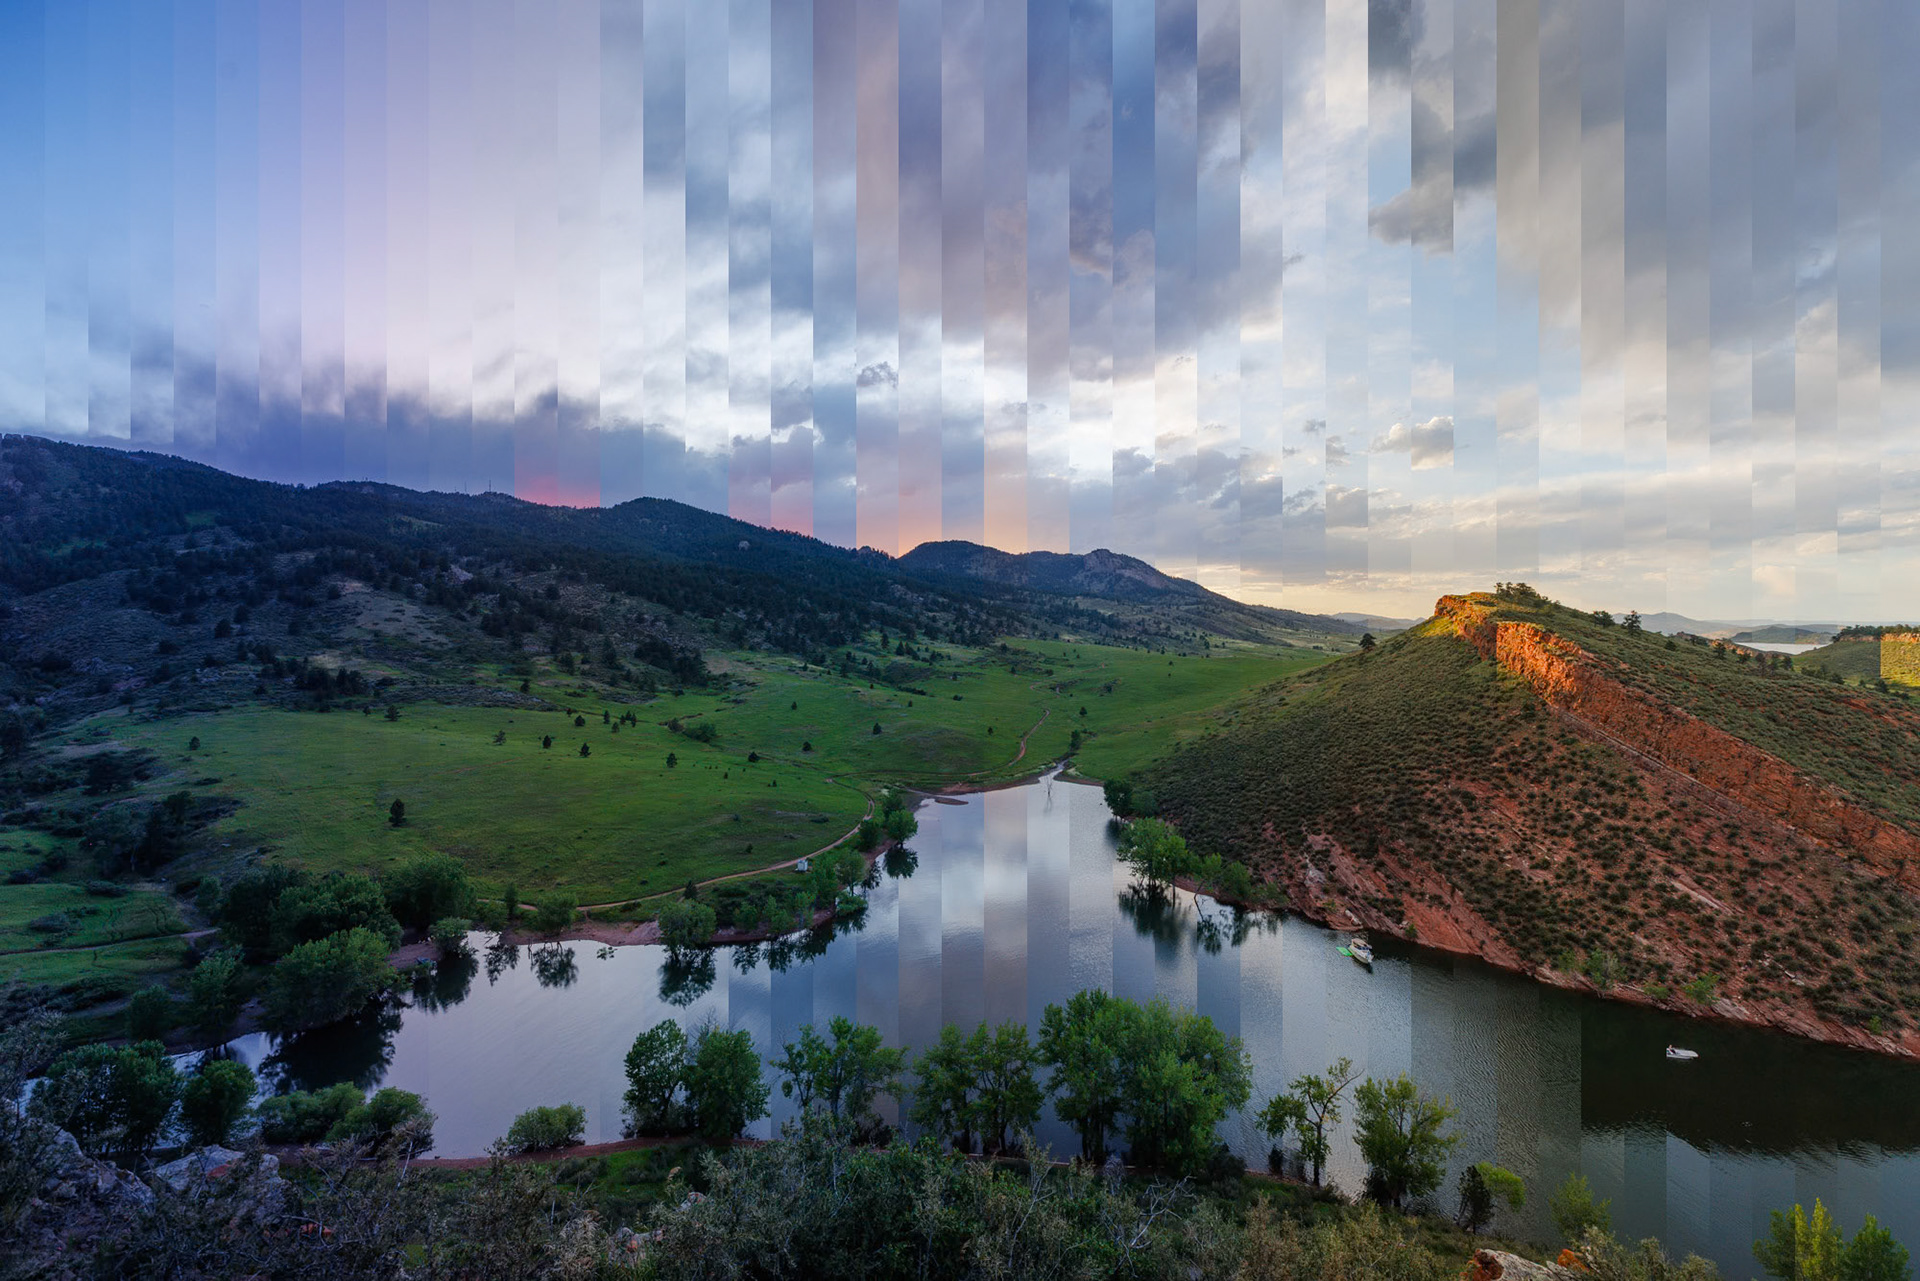
I’ll admit, I wasn’t entirely thrilled with the empty sky that filled the right third of the image. I think this is one reason that so many time slice images include city scenes (so that the lights turn on as it gets dark), but I’m a nature photographer and didn’t want to drive to a city scene. So working with what I had available, I tried reversing the order of the slices: earliest photo on the right and last photo on the left. It wasn’t much better if I’m being honest.
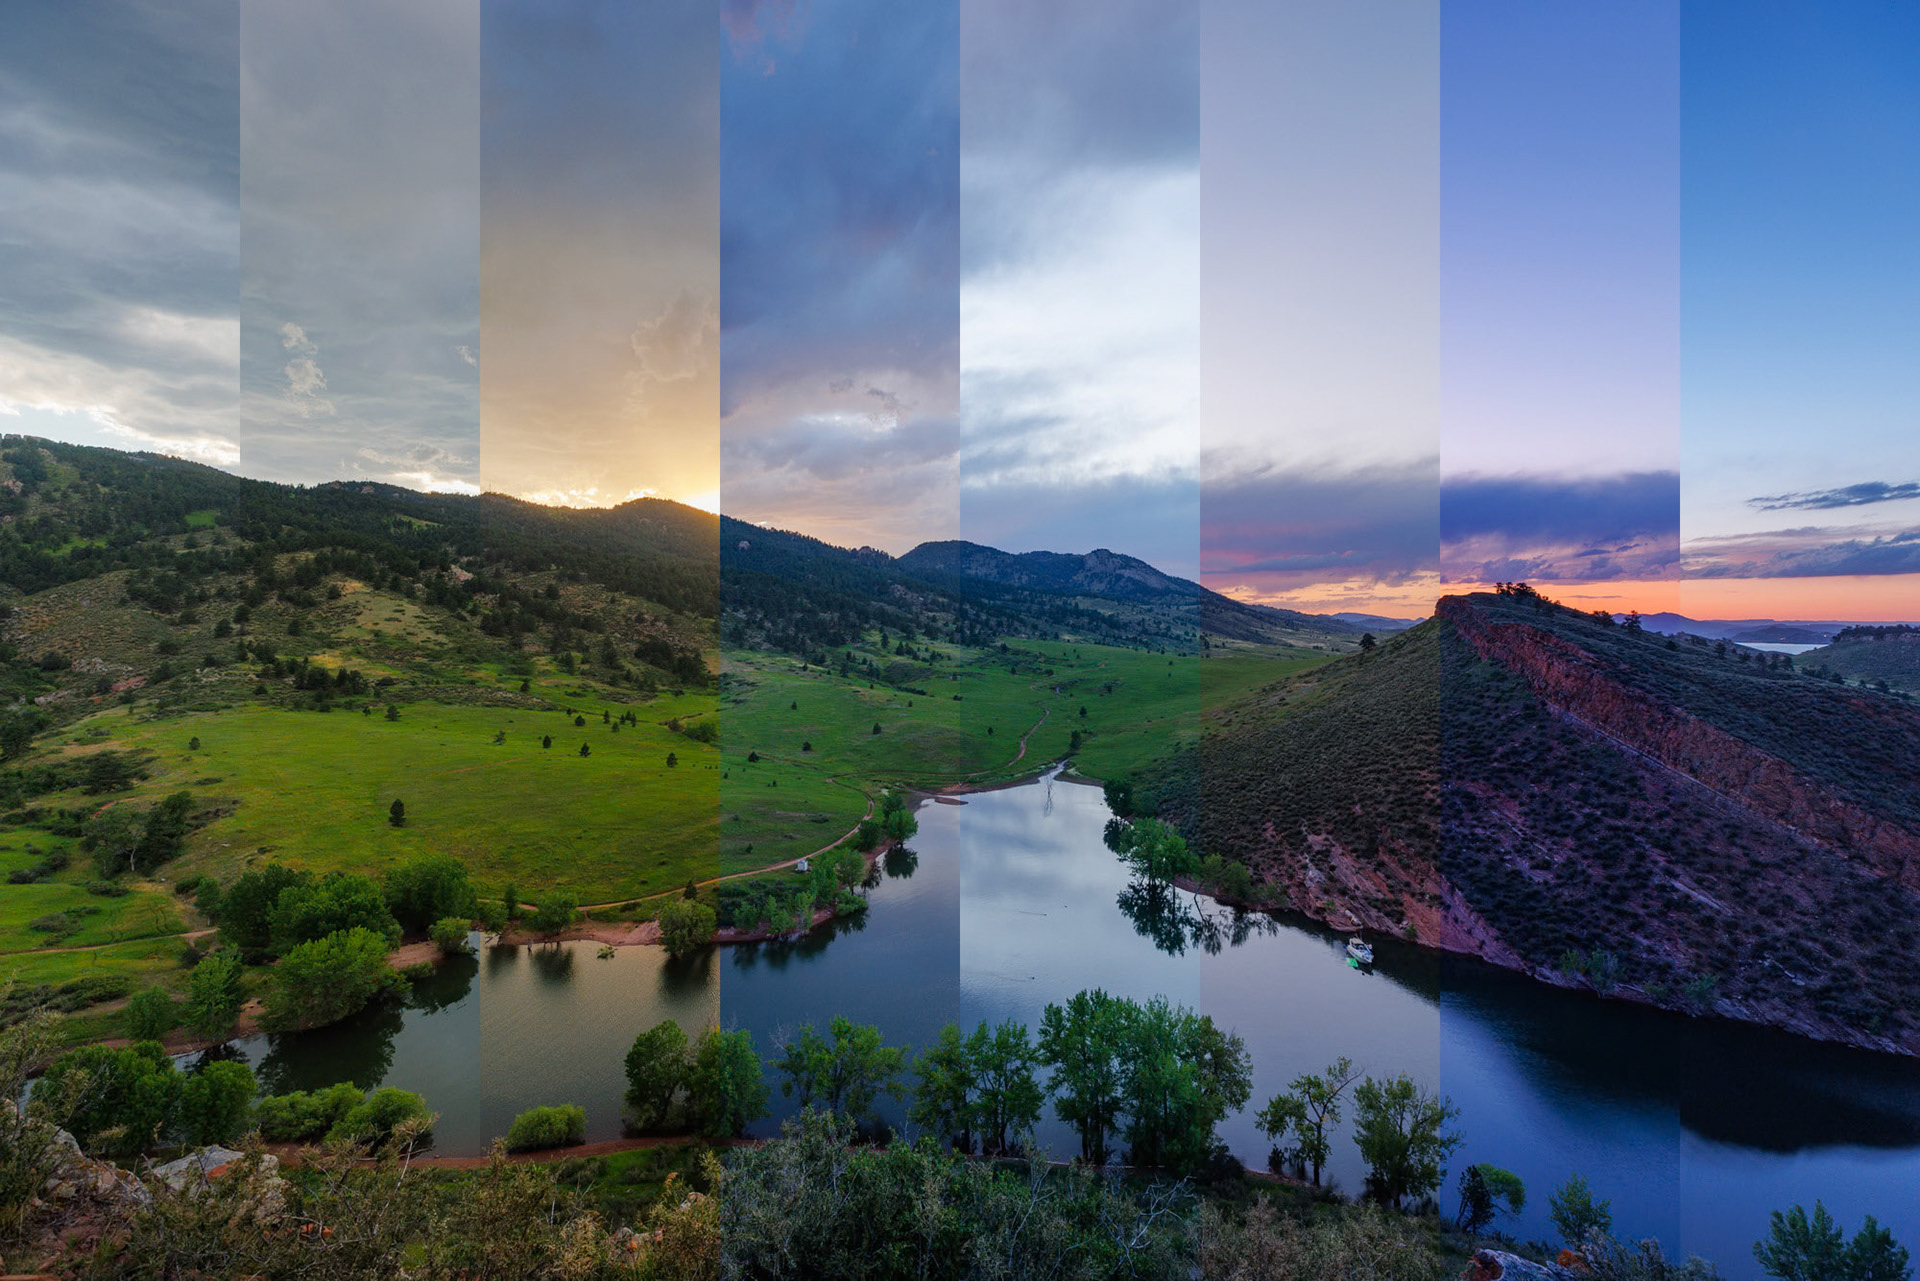
Interestingly, when I reduced the number of slices to just eight total, the exposure difference between the slices added to the interest in the blank area of the sky.
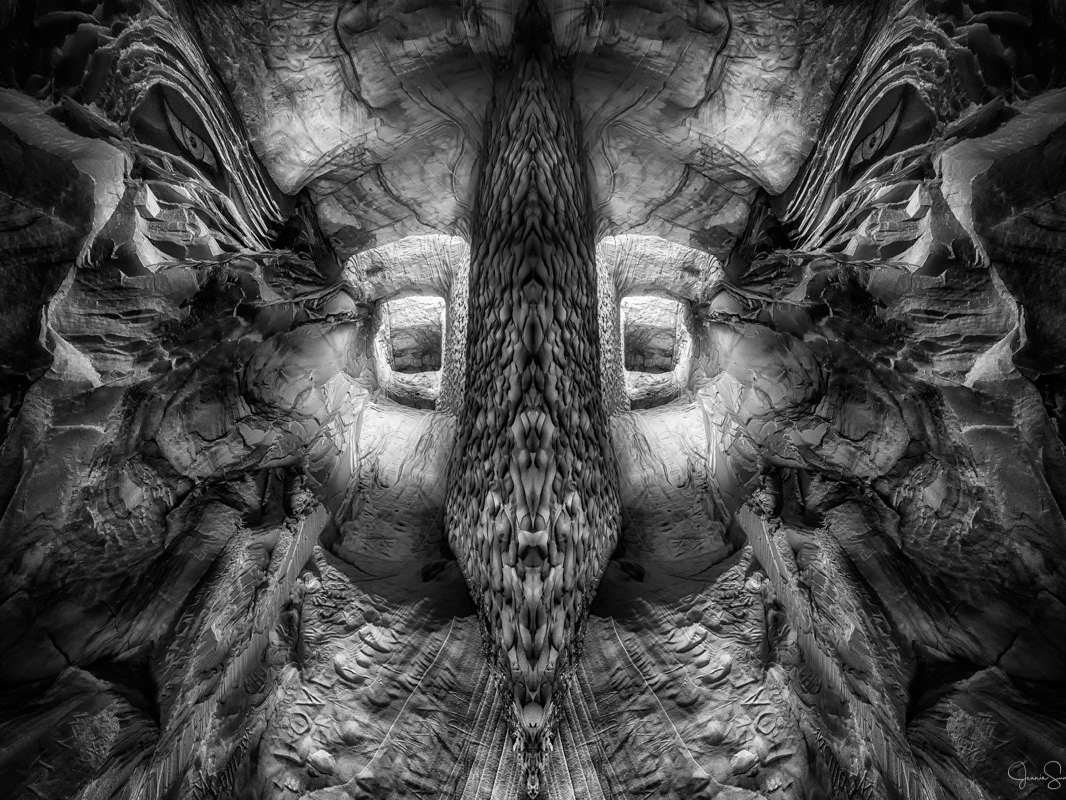
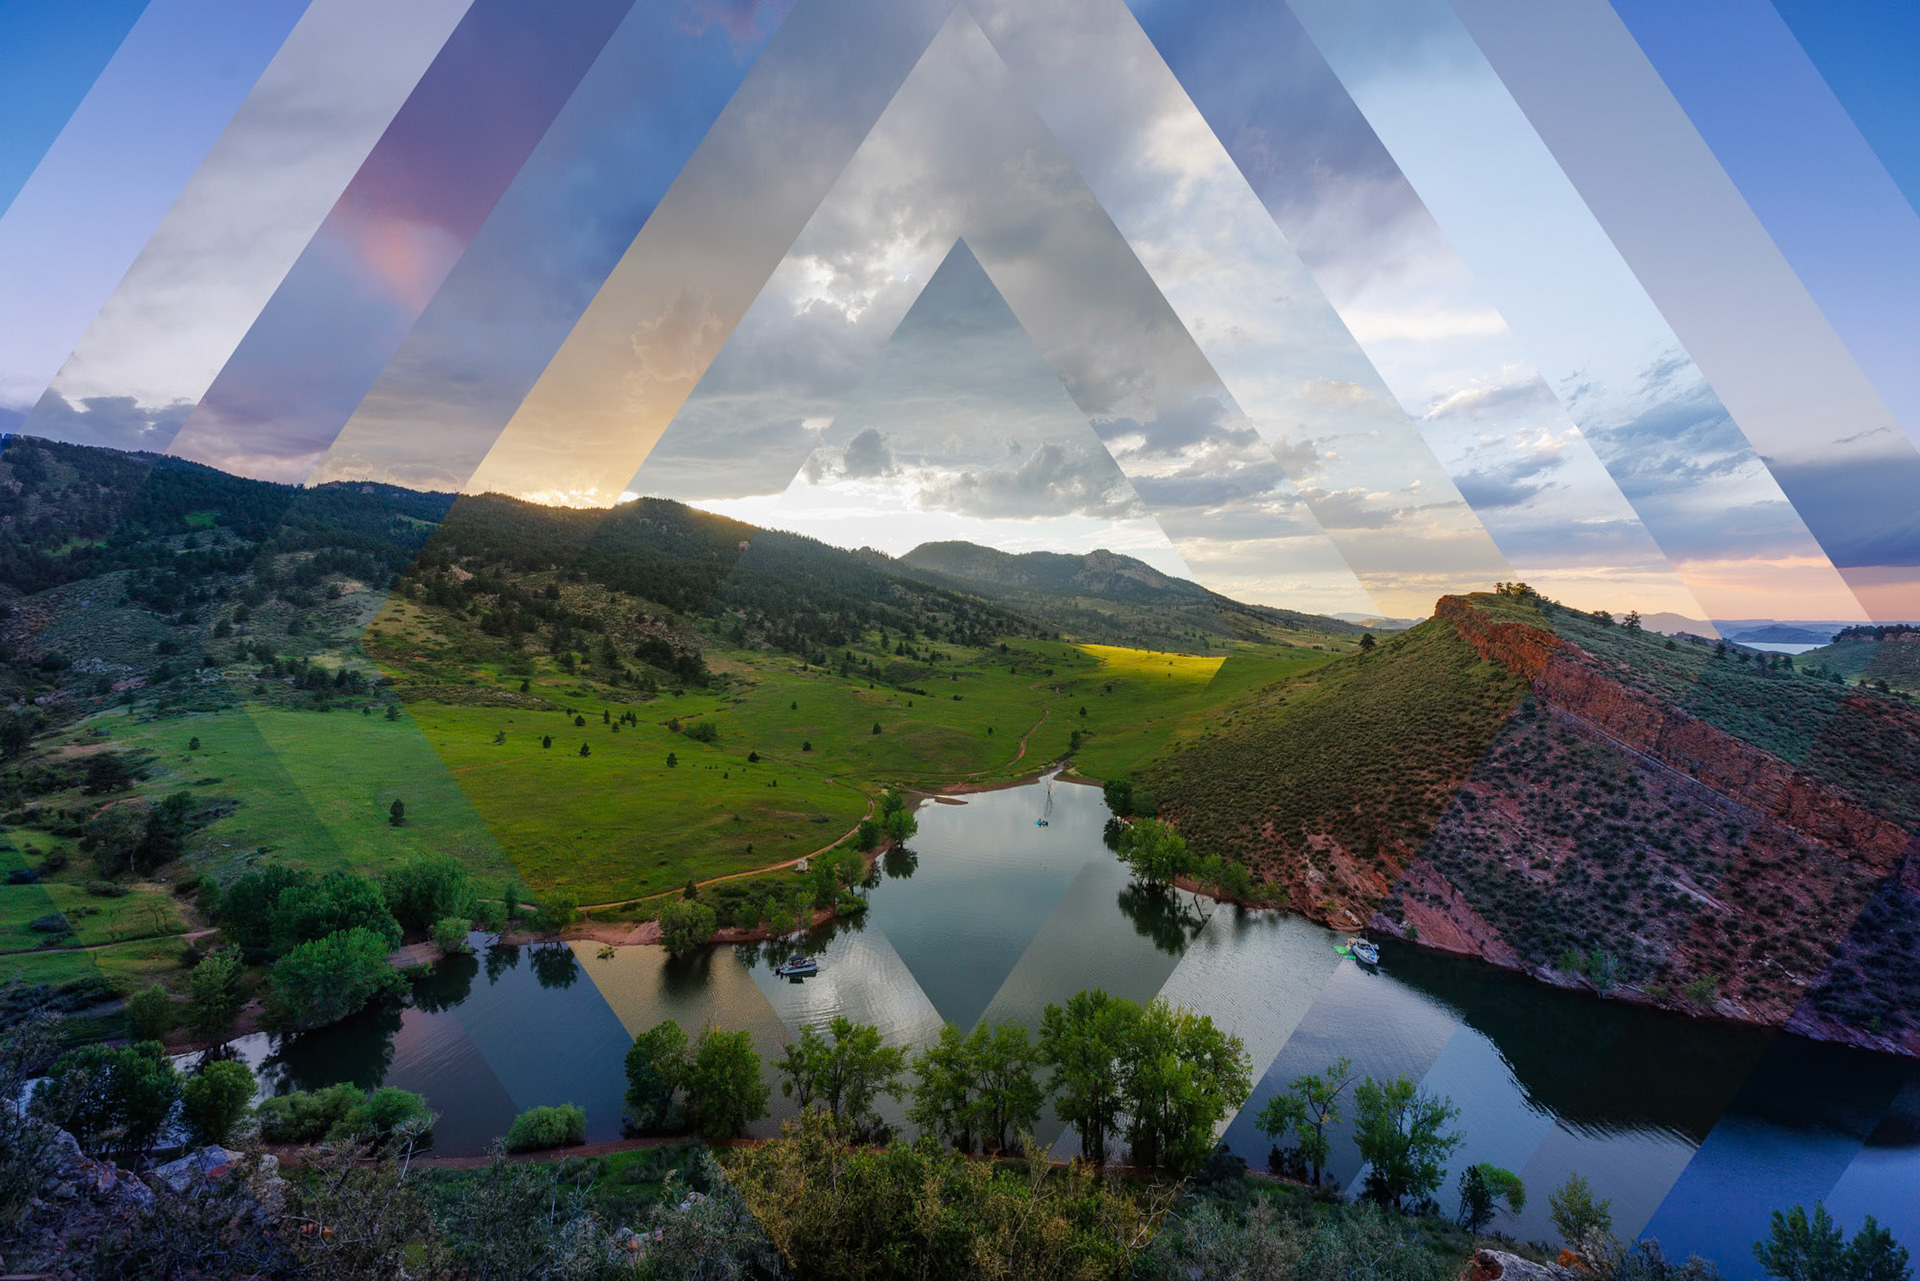
Still, I wasn’t in love with any of the time slice images yet, so I started playing with shapes for the “slices” instead of the vertical strips. Here’s one with diamonds:
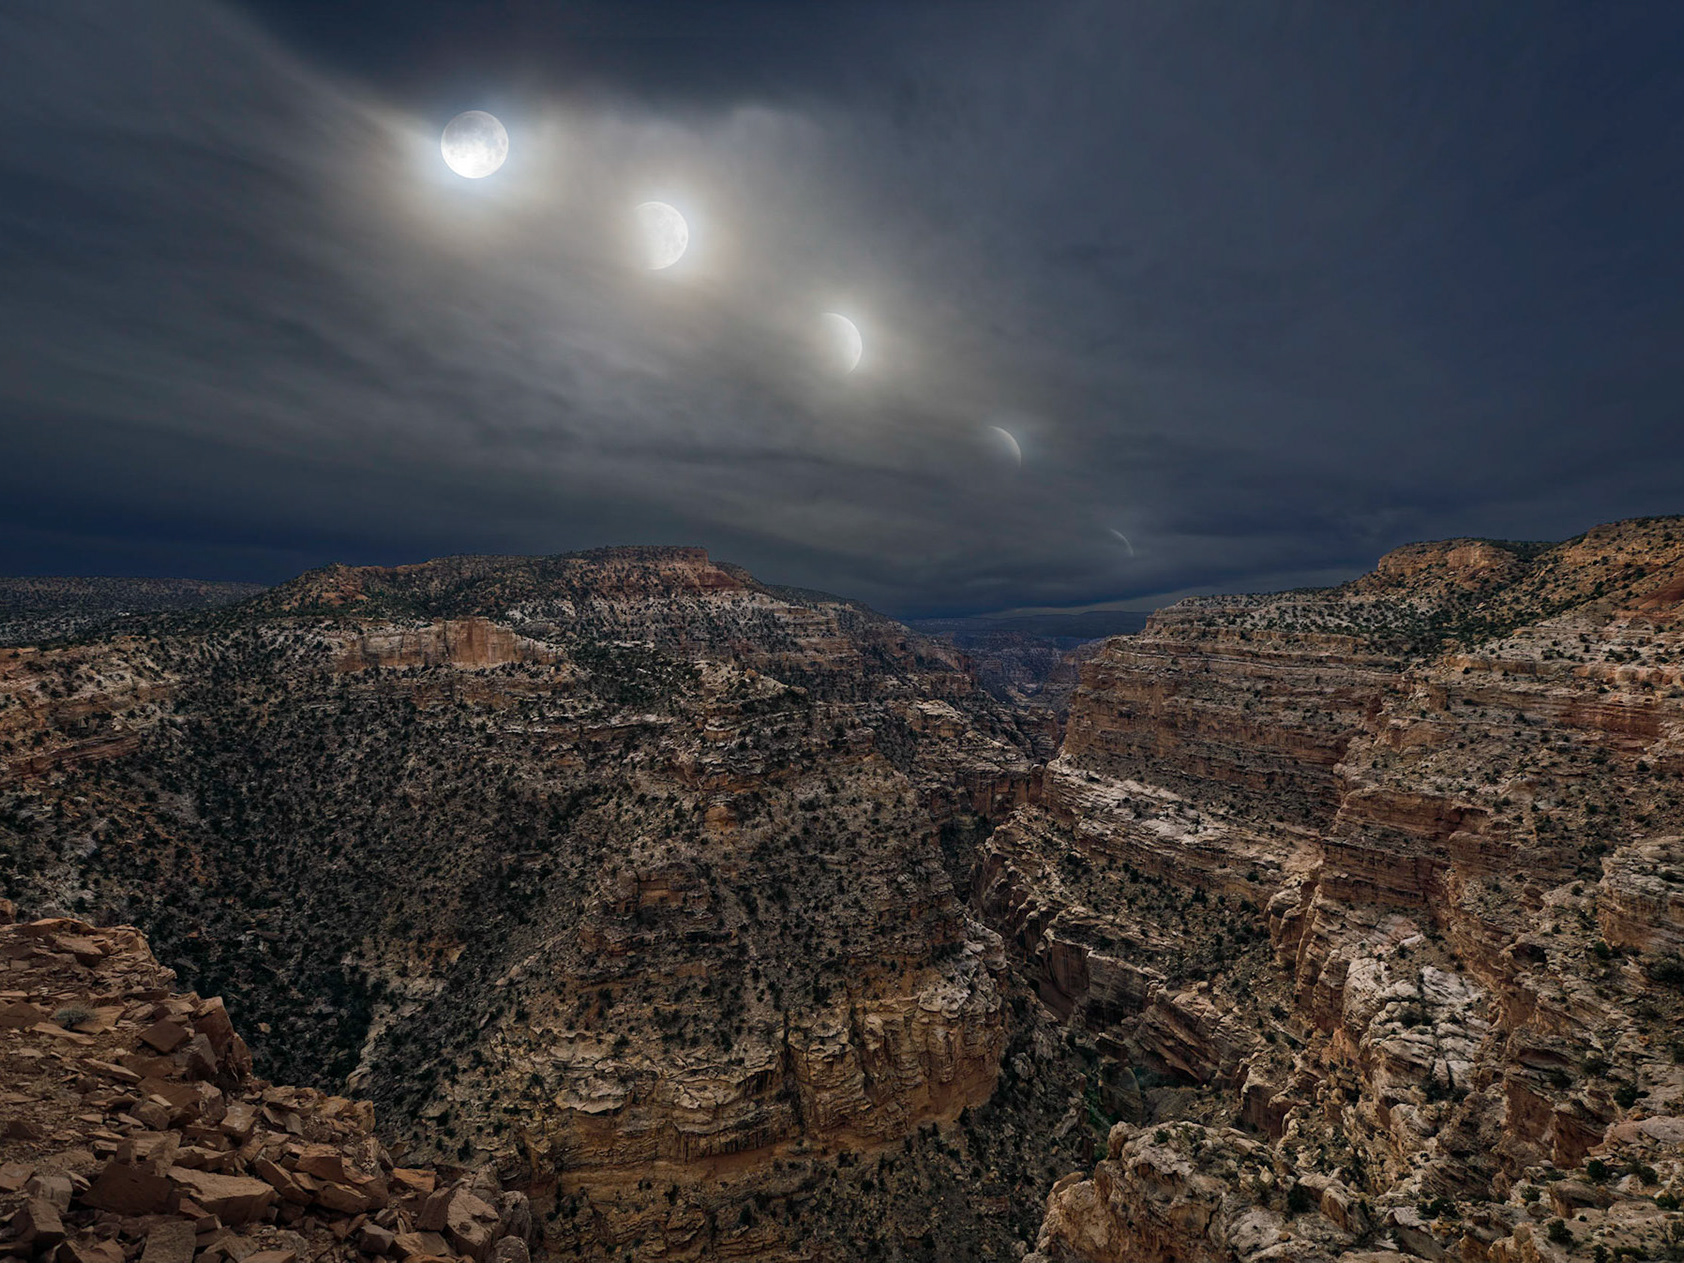
And here are 8 off-set ovals with the anchor point at the top which add quite a bit of interest to the sky.

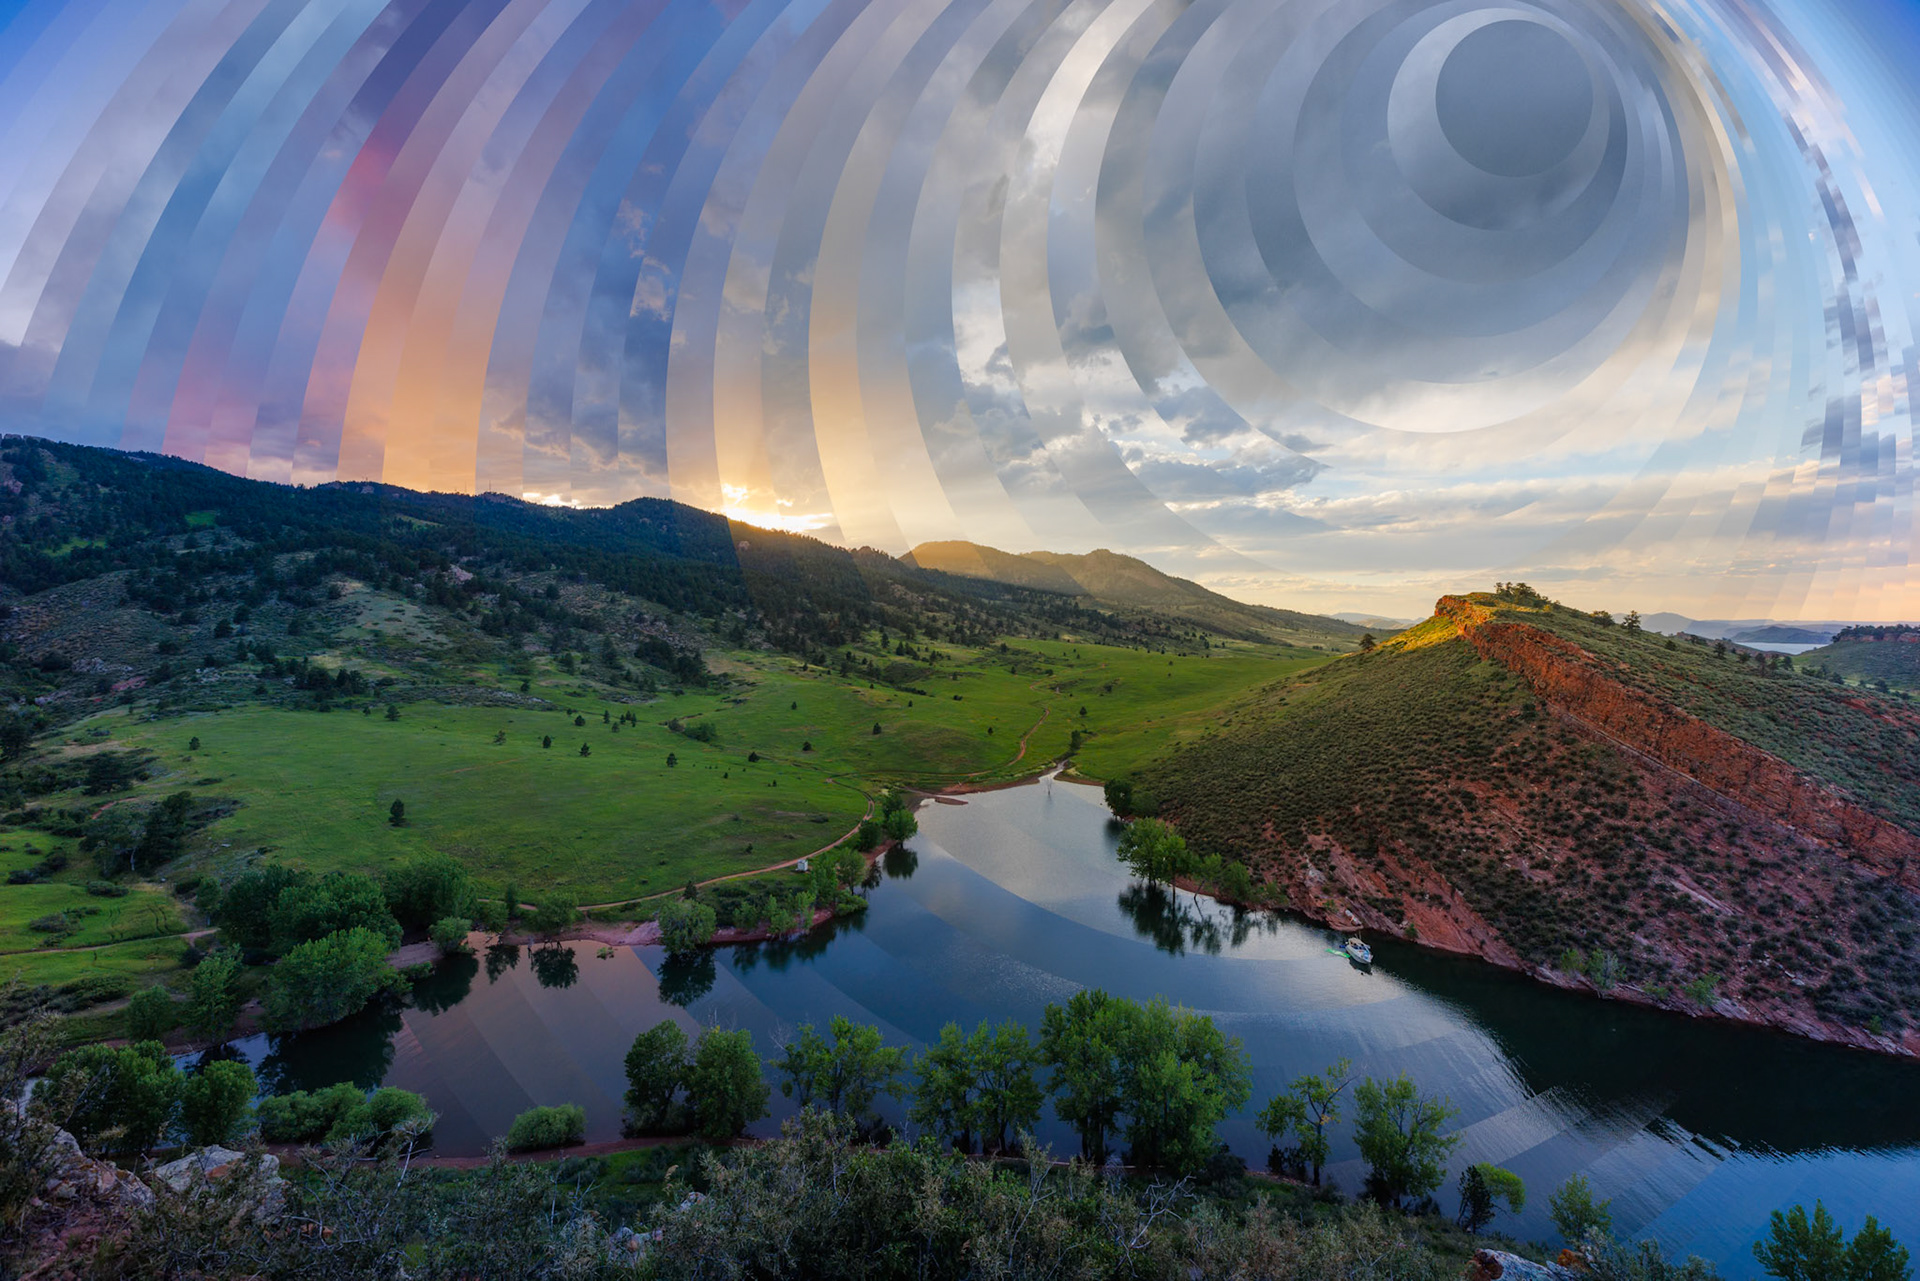
But my absolute favorite version came when I returned to using 44 nested off-set circles. (I used the Blend Tool in Adobe Illustrator and copied the resulting paths into Photoshop. Illustrator is the way to go for creating smooth transitions between shapes!) By positioning the smallest circle in the “blank” area of the sky, I was able to create interest in that area of the frame as well as include the colors from the sunset both in the sky and reflected in the water.
If you’d like to try this technique on your own, search for “timeslice photography tutorial” on YouTube. There are lots of videos to choose from. Or feel free to contact me about doing a presentation to your photo club. I feel I should warn you however that the entire process takes time, patience and attention to detail. :-)
For more inspiration, I encourage you to take a look at the work of the following photographers:
• Fong Qui Wei creates very unique time slice images with different sized slices and unique arrangements of those slices.
• Dan Marker-Moore also creates stunning time slice images and includes video versions of them along with the still images.
-----------------------------------------
One final note, it appears that someone has created a Photoshop script to create time slice images that should make the process much less arduous. I personally enjoy the process of creating unique shapes for my time slice images, but it might be worth trying this script if you want to give time slices a quick try: https://tejwani.com/time-slice-photography-photoshop-script-software/ (Note: I have no affiliation with this developer and have not used this Photoshop script myself.)